
Moving to Florida was a dream come true for John and Lisa. But as they settled in, the cracked and faded driveway quickly became an eyesore. They wondered if painting the concrete driveway could be a solution. If you’re dealing with the same issue, this guide on how to paint a concrete driveway will walk you through the steps to refresh your driveway from Florida’s harsh sun.
Painting your driveway is a fantastic way to refresh its look and enhance your home’s curb appeal. In Florida’s hot and humid climate, UV exposure and moisture can cause concrete surfaces to fade, crack, or discolor more quickly. That’s why proper maintenance, like sealing and painting your driveway, is about protecting your investment.
Preparing Concrete for Painting
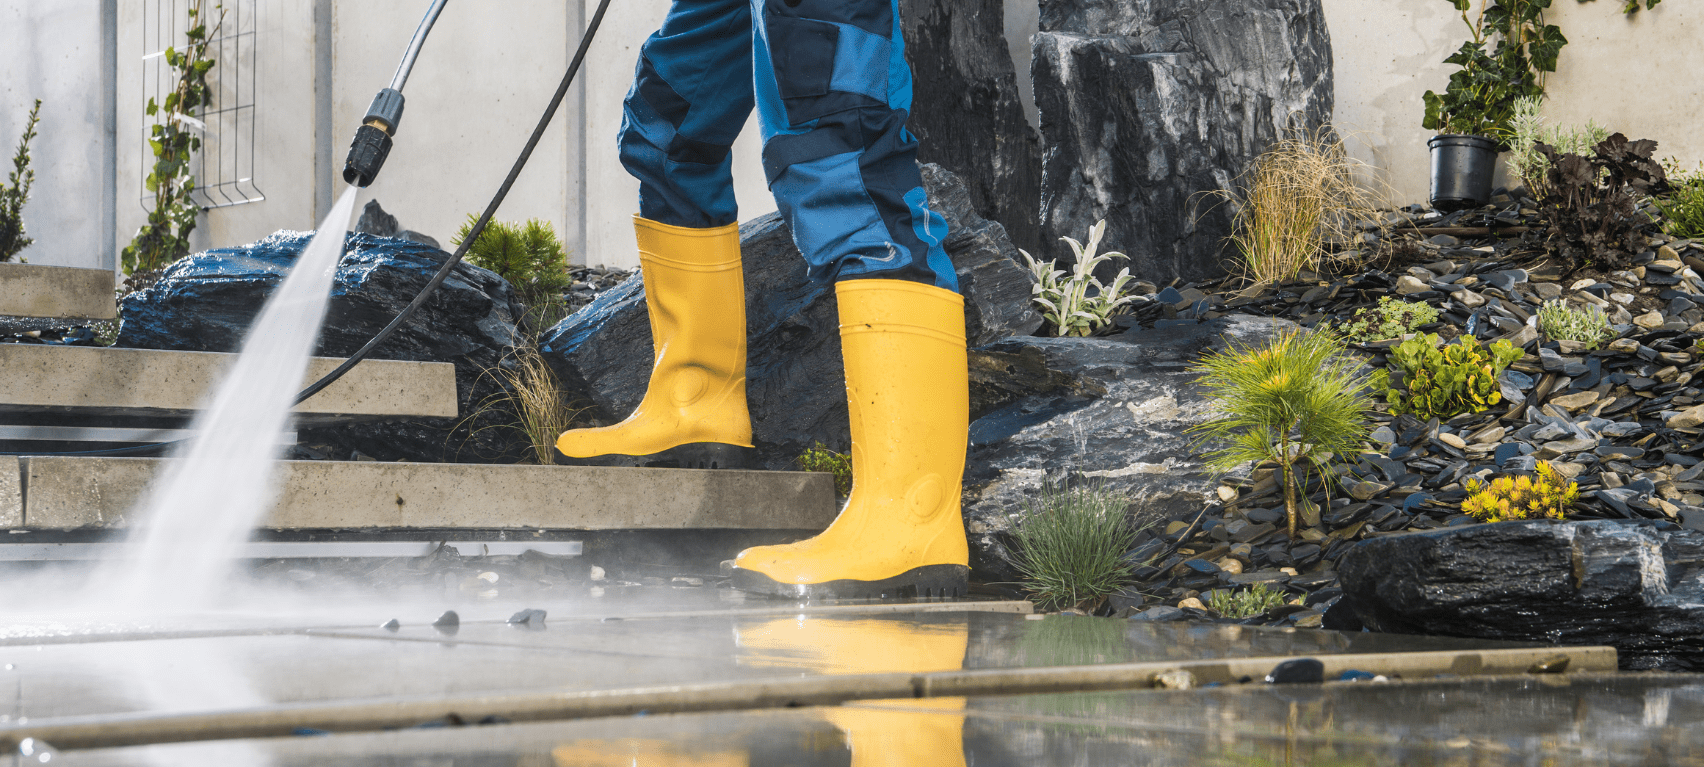
Florida painters recommend starting by power washing the driveway to remove dirt, oil stains, mildew, and any loose debris. For beginners, power washing, also known as pressure washing, involves using a high-pressure water spray to deep-clean hard surfaces.
Using too much pressure can leave permanent marks on your driveway. If you’re renting a washer for the first time, always follow the safety instructions.
A clean surface is necessary because it allows the paint to bond directly to the concrete without interference from debris or residue. Once the surface is dry, carefully inspect for cracks or surface damage. Use a concrete patching compound to fill in any visible cracks or holes, and let it cure fully according to the product instructions.
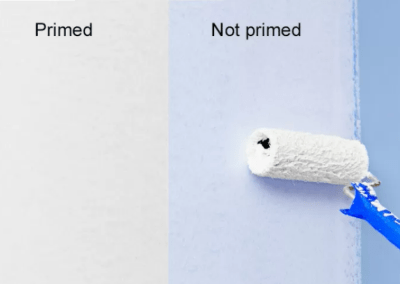
Next, apply a concrete primer made specifically for exterior surfaces. This helps improve adhesion and ensures the paint goes on smoothly and evenly. Be sure to let the primer dry completely, which typically takes 8 to 12 hours. In Florida’s humid and hot climate, it’s best to paint during cooler hours (early morning or late afternoon) and avoid rainy or overly damp conditions that can delay drying time or interfere with proper bonding.
Skipping or rushing any of these steps can lead to issues like peeling, bubbling, or fading, especially in Florida, where high UV exposure and moisture levels can quickly break down improperly applied paint.
Why Homeowners Paint Their Driveways & When You Shouldn’t
Painting a driveway is a popular choice for homeowners looking for a quick and affordable way to improve the appearance of their concrete. Driveway paint also serves as a protective layer that helps shield the surface from UV rays, moisture, and oil stains.
However, it’s not always the best long-term solution. One of the biggest downsides of painting a concrete driveway is durability.
In high-traffic areas or extreme climates, like Florida’s heat and humidity, paint may start to peel over time. Driveways that have cracks, uneven surfaces, or significant wear may not hold paint well. This means more touch-ups and maintenance to keep it looking good.
After resurfacing, you can still paint the driveway to add color and protection. In fact, applying paint or a tinted sealer on a resurfaced surface produces longer-lasting results since the surface and more receptive to coatings.
Resurfacing lays the groundwork for durability, and painting adds the design touch. Together, they dramatically improve appeal and resale potential.
How To Paint A Concrete Driveway
Step 1: Inspect the Driveway Surface
- If the concrete is new, wait at least 28 days for full curing.
- Pour water on the surface. If it beads, a sealer is present and must be removed.
- Look for cracks and stains. Cracks need to be filled and oil stains must be removed or they’ll bleed through paint.
- Tape plastic over a small section for 24 hours. If moisture appears underneath, do not paint until resolved.
Step 2: Clean Thoroughly
- Power wash the driveway to remove dirt, dust, algae, and debris.
- Use a concrete degreaser or TSP for oil spots or mildew. Scrub and rinse well.
- Let the surface dry for at least 24 hours.
Step 3: Repair Cracks and Damage
- Use a concrete patching compound to fill hairline cracks, chips, or divots.
- Smooth patched areas with a trowel to avoid visible bumps under the paint.
Step 4: Etch or Prime the Surface
- If the concrete has never been painted, etch the surface using a concrete etching solution ( citric or muriatic acid-based).
- After etching or if etching is skipped, apply a masonry primer made for driveways to improve adhesion.
Step 5: Choose the Right Paint
- Use exterior-grade epoxy or acrylic concrete paint formulated for driveways and heavy traffic.
- Avoid using standard house paint as it won’t hold up to vehicle wear.
Step 6: Apply Paint in Two Coats
- Use a roller with an extension pole or sprayer for even coverage.
- Apply the first coat in small sections, working from the top of the driveway down.
- Allow at least 4–6 hours of drying time between coats.
- Apply a second coat for better durability and color depth.
Wait 24 hours before light foot traffic.. Wait 3–5 days before driving or parking on the surface.
Choosing The Right Paint and Tools
Selecting the best paint and tools guarantees a long-lasting and attractive finish. Painters in Florida suggest the following tools when painting a concrete driveway:
| Category | Examples |
| Paint Type |
|
| Primer |
|
| Roller |
|
| Brushes |
|
| Extension Pole |
|
| Etching Solution |
|
| Concrete Sealer (Optional) |
|
Conclusion
Painting your driveway isn’t just about improving the surface, it’s about reclaiming the feeling you had when you first fell in love with your home. A faded, stained, or cracked driveway can chip away at that pride, but a fresh coat of paint brings back that sense of care, order, and attention to detail.
If you’re not up for the task yourself, hiring the best house painters in Florida can ensure a perfect job. Experts can handle the preparation, painting, and sealing, giving you peace of mind and a gorgeous driveway.
Ready to get started? Reach out to painters in Miami, Tampa, Orlando, North Port and beyond for expert assistance and a free quote today.
Frequently Asked Questions
How to clean a concrete driveway?
Start by sweeping away loose dirt, leaves, and debris with a broom or blower. That alone can make a big difference. For everyday stains or general buildup, a power washer and a concrete-safe detergent will do the trick.
If you’re dealing with oil stains or grease spots (we’ve all had that one leaky car), grab a concrete degreaser or some trisodium phosphate (TSP). Scrub the area with a stiff-bristle brush, then rinse it thoroughly. For mold or mildew, especially in shady areas, mix one part bleach with four parts water, give it a good scrub, and rinse.
How do you remove rust from a concrete driveway?
Use a commercial rust remover made for concrete (like Singerman Labs Rust Remover or Rust-Oleum’s cleaner). For a DIY option, you can mix lemon juice or white vinegar with baking soda to form a paste. Apply it to the rust stain, let it sit for 15–30 minutes, scrub with a brush, and rinse clean. Avoid using harsh acids like muriatic acid.
How to fix cracks in a concrete driveway?
You can use a liquid concrete filler or a patching compound. Start by cleaning the crack and get rid of any dust, dirt, or loose bits. Then apply the filler with a caulking gun or putty knife, smooth it out, and let it cure based on the product’s instructions.
For bigger cracks or damage that looks like it’s spreading, it’s best to call in a pro. Large cracks may be a sign of settling or structural issues that go beyond a DIY fix.